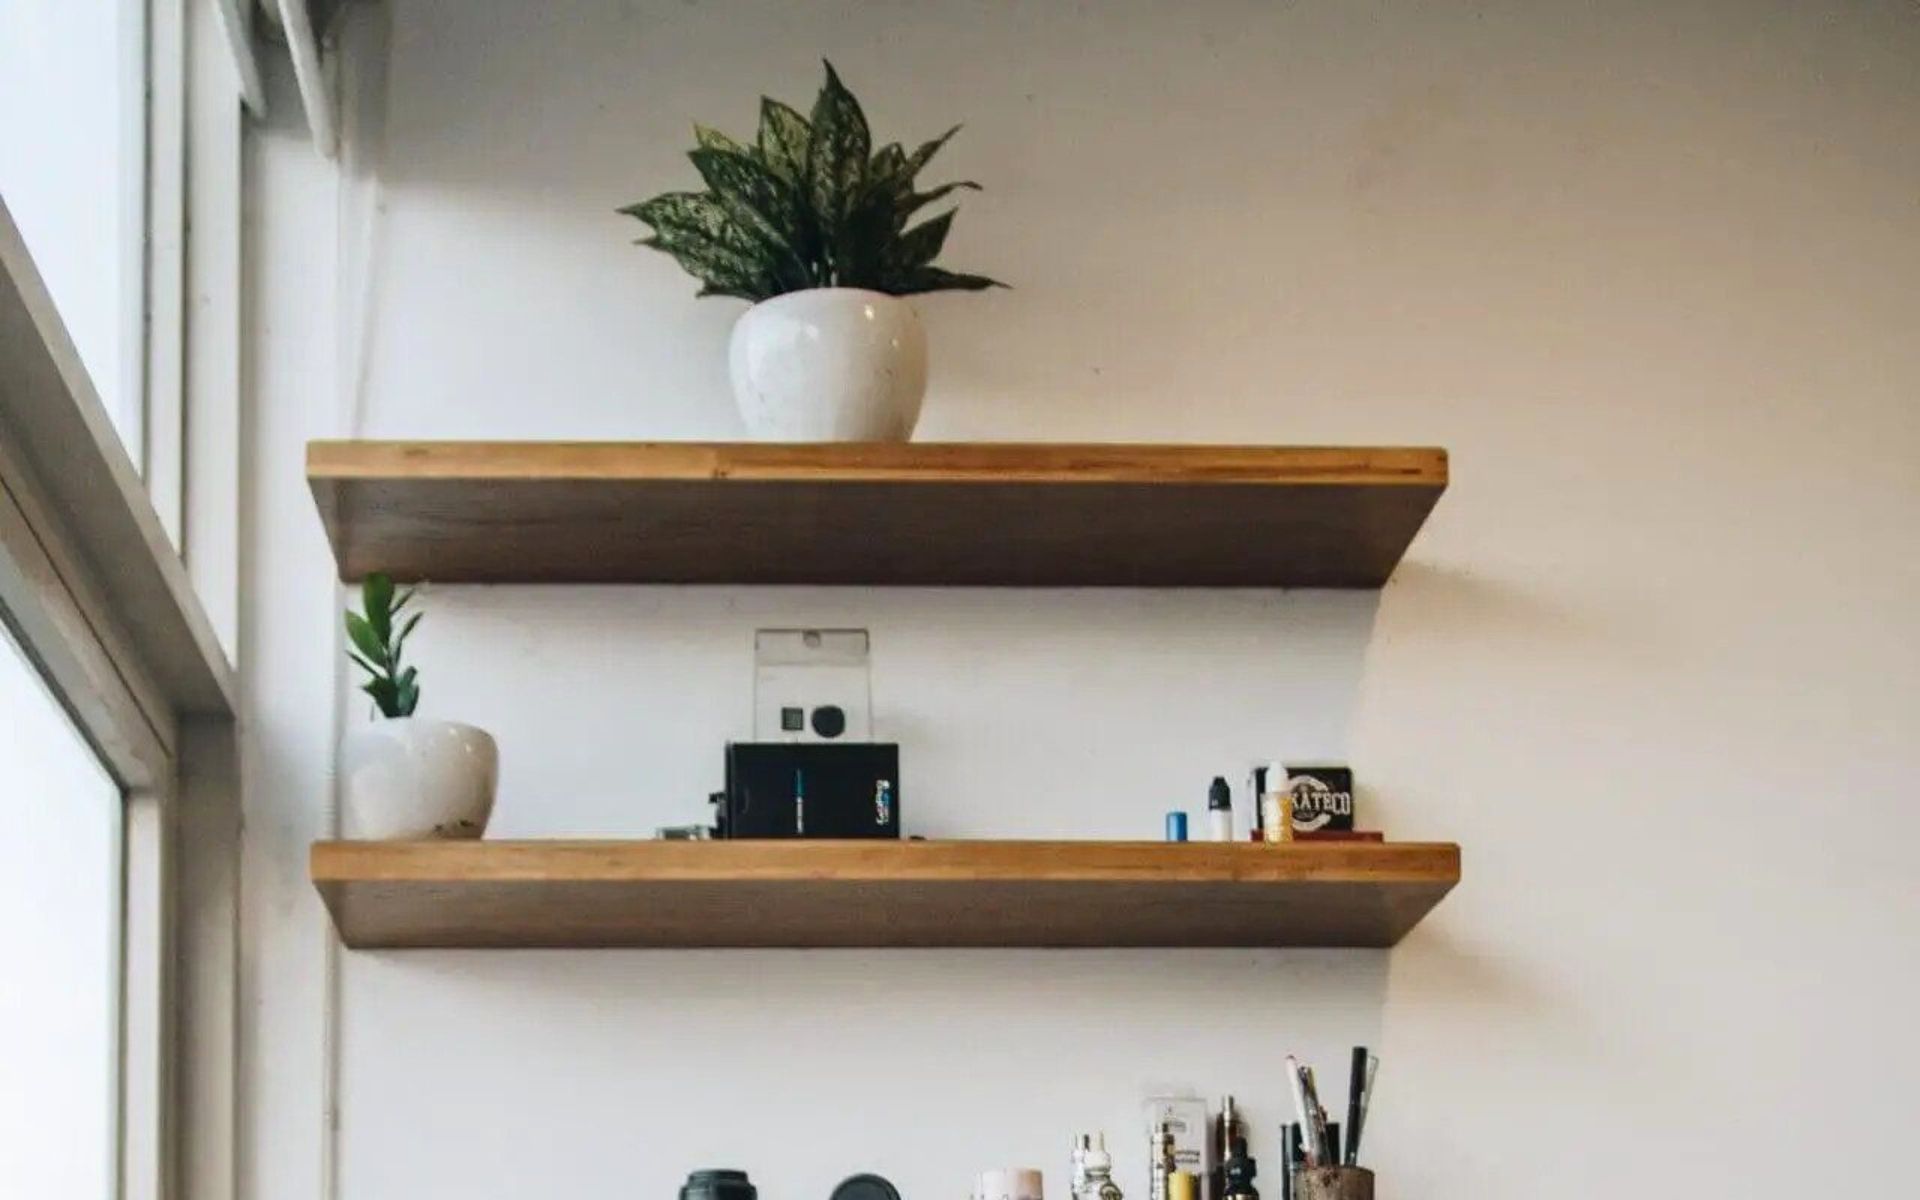
Floating shelves are a popular choice for homeowners looking to add stylish and functional storage solutions to their spaces. These shelves appear to “float” on the wall, creating a clean and modern look. If you’re interested to understand how to install floating shelves in your home, follow these easy to install floating shelves instructions for a successful installation.
Easy and Successful Installation of Floating Shelves
1. Determine Shelf Placement
Decide where you want to install the floating shelves and mark the desired placement on the wall using a pencil. Use a spirit level to ensure your marks are straight and level. Consider factors such as the height, spacing between shelves, and the overall visual appeal of the room.
2. Locate Wall Studs
If you’re able to attach the floating shelf brackets directly to wall studs, it will provide extra stability and weight capacity. Use a stud finder to locate the studs behind the wall. Mark the stud locations on the wall, as they will be the preferred attachment points for the brackets. If you’re unable to find studs in the desired location, you’ll need to use wall anchors for additional support.
3. Install the Floating Shelf Brackets
Following the manufacturer’s instructions, attach the floating shelf brackets to the wall. If using studs, position the brackets directly over the marked stud locations. Use a drill and screws to secure the brackets to the wall.
Ensure they are level and properly aligned. Always use the right hardware and tools for your specific wall material to ensure a secure and long-lasting installation. These systems typically consist of adhesive-backed channels or clips that keep the wires neatly organised and out of sight.
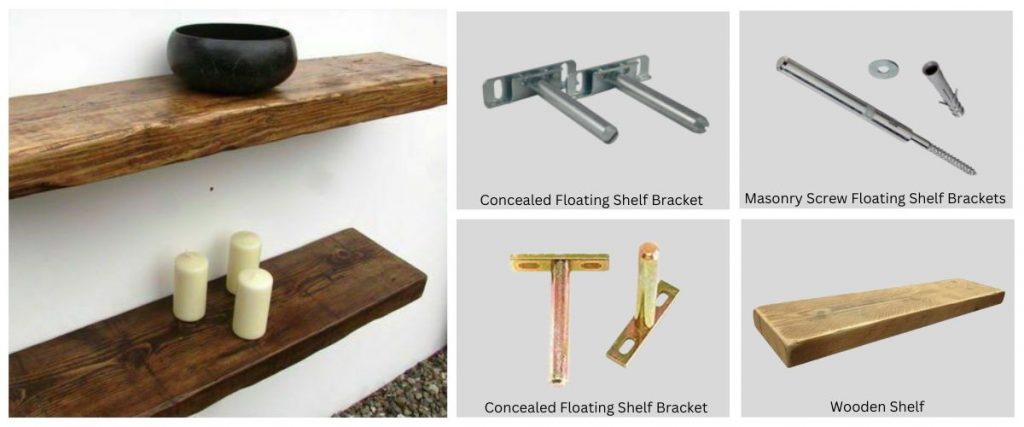
Buy Now: Floating shelf brackets
Buy Now: Wooden Shelves
4. Customizing Shelf Length
If you can’t find floating shelves in the exact length you need, many home improvement stores offer cutting services where you can have the shelves trimmed to your desired length. This allows you to achieve a custom fit and maximise the use of your available space.
5. Experiment with Arrangement
Floating shelves offer flexibility in terms of arrangement. Play around with different configurations, such as staggering the heights or creating asymmetrical patterns, to add visual interest to your wall. Consider the overall aesthetics of the room and the items you plan to display on the shelves.
6. Regular Maintenance
Periodically inspect your floating shelves for any signs of damage or loosening. Check the brackets, screws, and shelves themselves for stability. Clean the shelves regularly to remove dust and debris. This maintenance routine will ensure the longevity and safety of your floating shelves.
Installing floating shelves is a rewarding and practical DIY project that can elevate the style and functionality of your home. With careful planning, proper tools, and attention to detail, you can enjoy beautifully displayed items and efficient storage while enhancing the overall aesthetic of your living space.
Read Also: How to Install a Curtain Pole in 5 Easy Steps?
Important Pointers about the Floating Shelves
There are a number of applications here as well, albeit we’re specifically talking about beams. The beams can be used for shelving, furniture, floors, fireplaces, and structural applications.
It is one of the many options you have if you’re shopping for new shelving. Although various varieties of wood, including metal, plastic, rubber-coated glass, and plastic, are widely used, it must rank at the very top of the list, if not immediately at the top. This is excellent as a shelf material, but it is even more impressive when utilised as a floating shelf.
Learn the Top 5 Reasons Why You Should Put Floating Shelves on your Shopping List by Reading on.
1. It Floats
What makes floating shelves so great? They naturally float.
Let’s face it, some shelves are ugly to look at. The style of the shelf will frequently be compromised by brackets, which also reduces the number of locations where you may really position the shelves. You must make room for both the brackets and the shelf in addition to the shelf itself.
But there are fewer issues when using floating wood shelves. When placed, they will appear to float in the air, giving you a location to set up your cherished positions.
2. They’re Simple to Install
Speaking of setup, installing floating shelves is actually rather simple. You’ll be in good shape if you follow these 8 easy steps.
With the least amount of hassle, you should be able to install a floating shelf even if you have minimal DIY experience.
Ask a friend or relative who has experience if you are unsure about your own capabilities.
3. They require little upkeep
Floating shelves require little upkeep. You can stay on top of things and make sure your floating shelves look as nice as they should, all year long, using the variety of waxes, polishes, and varnishes that are readily accessible.
They are ideal for both traditional and modern homes. Really, it has no bounds. In reality, the uses for wood are virtually endless.
It is incredibly adaptable when it comes to being utilised as furniture or décor. It may be used to produce a variety of themes in both traditional and modern homes, assisting you in achieving the theme you’re striving for.
It is a fantastic material for constructing a versatile feature piece for any home because it goes well with a variety of designs. When it stands out and can be a focal point on its own, a floating wood shelf doesn’t need to blend in.
4. Decorative Items, Books, and Many More
Displaying ornaments, books, and other household furnishings on floating shelves is one of their most popular uses. You don’t need to worry about the weight of the objects being stored on the shelf due to the durability of the oak and the fittings.
A traditional shelf built of natural oak may really stand out when decorated with antiques or rustic accents. Its straightforward appearance compliments a wide range of embellishments.
Gather the Necessary Tools and Materials
Before you begin the installation process, gather all the tools and materials you’ll need. These typically include:
- Floating shelf brackets or hardware
- Spirit level
- Wall anchors
- Screws
- Screwdriver or drill with a screwdriver bit
- Stud finder
- Measuring tape
- Pencil
- Drill
Final Thoughts
Storage can be a problem in many homes, particularly in rural or small cottages. Floating shelf brackets can provide you with the extra storage space you need for your household goods or other vital items. Any home can look better by making an investment in a floating shelf.
Thanks for Reading! Forward this article to your friends who want to know how to install floating shelves.