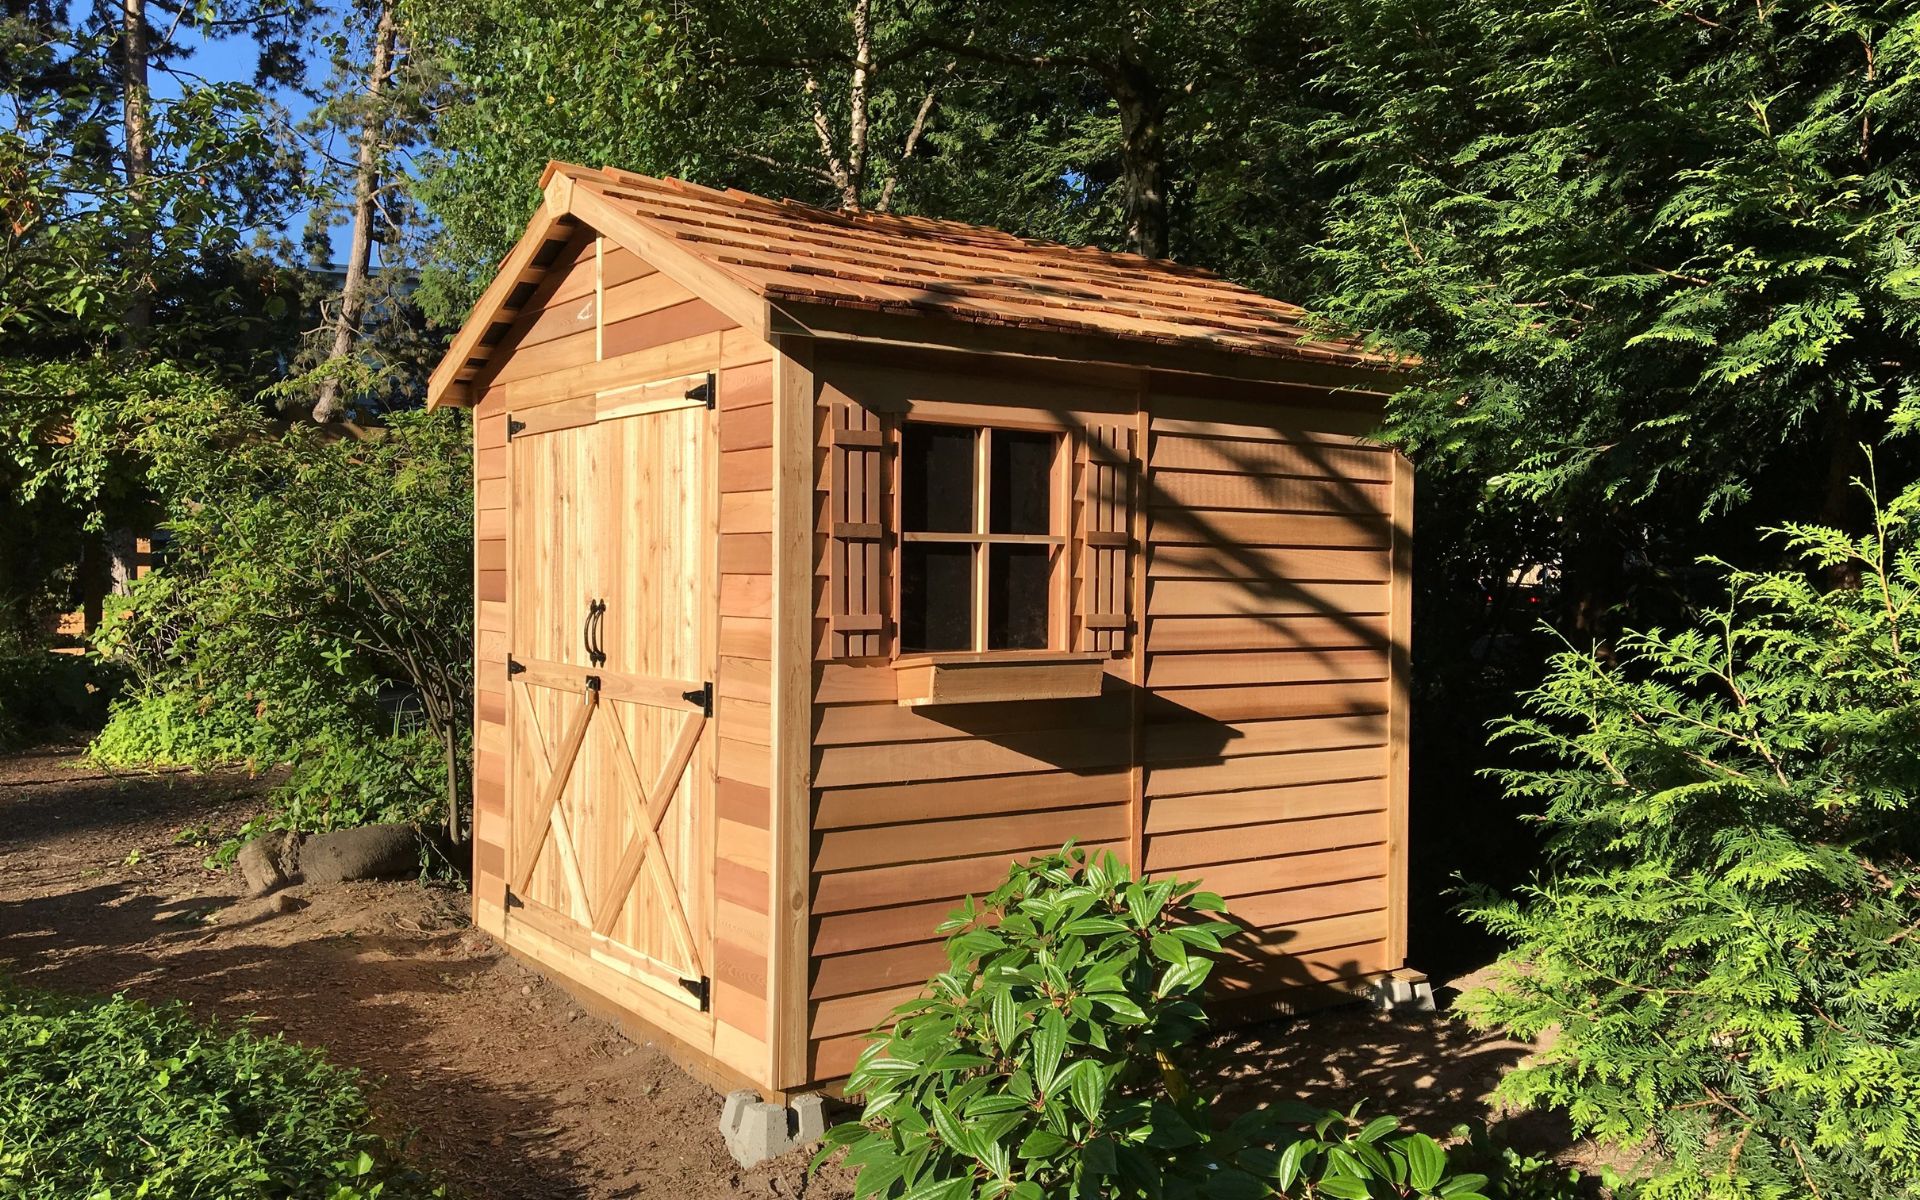
Gardening can be a great way to relax and enjoy nature. However, the tools and equipment needed for gardening can take up a lot of space, making it hard to keep everything organized. A garden wooden shed can be the perfect solution to this problem. Building a garden wooden shed may seem like a daunting task, but with the right tools and instructions, it can be a fun and rewarding project. In this blog post, we are going to tell you how to set up a garden shed.
Read Also: Explore The List of Different Types of Door Hinges
Step-by-Step Guide on How to Make a Wood Shed
1. Choose a Location
The first step is to choose a suitable location for your garden shed. It should be a flat, well-drained area that is easily accessible. Consider the sun and wind patterns in the location, as this can affect the longevity of your shed.
2. Determine the Size
Decide on the size of your garden shed based on your storage needs and available space. The standard size of a garden shed is 8 feet by 10 feet, but you can adjust the size according to your needs.
3. Purchase Materials
The materials needed for building a garden shed include wood, nails, screws, and roofing materials. You can purchase these materials from a local hardware store or online.
4. Build the Base
The base is the foundation of your garden shed. It should be built on a level surface and made of pressure-treated wood to prevent rotting. Use a framing square to ensure the corners are at right angles.
5. Build the Frame
The frame is the skeleton of your garden shed. Cut the wood to the appropriate lengths and use a nail gun to attach the pieces together.
6. Install the Walls
Once the frame is complete, install the walls by attaching them to the frame using nails or screws.
7. Add the Roof
The roof is the final part of the structure. Use roofing materials such as shingles, metal sheets, or asphalt to cover the roof. Use 2x4s to construct the roof frame on a flat surface. Then, lift it onto the top of the walls and secure it with 3-inch deck screws. Install roof deckings, such as plywood or OSB, and cover them with roofing material.
8. Install Doors and Windows
Cut a door opening into one of the walls and install the door. You can also add windows for natural light and ventilation.
9. Paint or Stain
The final step is to paint or stain your garden shed to protect it from the weather and make it look attractive.
Building a garden wooden shed may seem intimidating, but with the right instructions and tools, it can be a fun and rewarding project. A garden wooden shed can provide a dedicated space for storing tools and equipment, making gardening easier and more enjoyable.
Sure, here are some more steps to follow for building a garden wooden shed:
10. Prepare the Floor Frame
Using the same pressure-treated lumber, cut out 2x4s and lay them on the ground to form a rectangular frame. Secure them with 3-inch deck screws at the corners.
11. Install the Floor Joists
Using the same 2x4s, install floor joists spaced 16 inches apart, perpendicular to the floor frame. Secure them to the frame with 3-inch deck screws.
12. Attach the Plywood
Cut the 4×8 plywood sheet in half, so you have two 4×4 pieces. Place them on top of the floor frame and secure them with 2-inch deck screws every 8 inches around the edges and every 12 inches in the field.
13. Build the Walls
Using 2x4s, construct the walls on a flat surface. Measure and cut the studs, plates, and headers for the wall frames. Space the studs 16 inches apart and secure them to the plates with 3-inch deck screws. Then, attach the headers and top plates to complete the wall frames.
14. Stand up the Walls
Enlist the help of a friend or two to help you stand up the wall frames and secure them together with 3-inch deck screws.
15. Install the Door
Cut out a door frame from 2x4s and attach it to the wall frame with 3-inch deck screws. Cut and install the door with hinges and a latch.
16. Install the Windows
Cut out a window frame from 2x4s and attach it to the wall frame with 3-inch deck screws. Install the window sash and secure it with screws.
17. Install the Roof
Now it’s time to install the roof. Start by measuring the roof rafters and cutting them to size using a saw. Make sure they are all the same length and then nail them into place. Install the plywood on top of the rafters and then nail the shingles to the plywood.
18. Add the Doors and Windows
The next step is to add the doors and windows. Measure and cut the door and window frames to the size and then install them into the walls. Make sure they are level and square before nailing them into place.
19. Finish the Shed
Once you have completed the above steps, it’s time to finish the shed. Sand down any rough edges, fill in any gaps with wood filler, and then paint or stain the shed. This will help to protect it from the elements and keep it looking good for years to come.
Sand any rough edges and apply a coat of paint or stain to protect the wood and make it look good. Install any shelving or storage solutions you need to make the shed functional for your purposes.
Building a garden wooden shed can be a rewarding and cost-effective project. With these steps and some basic tools and materials, you can have a custom shed that fits your needs and enhances the look of your outdoor space.
Garden Hardware: Hinges, Side gate kit, Garden Lights, Hanging Basket brackets, Fence chain, Boot Scrapers
Final Thoughts
Building a garden wooden shed can be a fun and rewarding project. By following these steps, you can create a beautiful and functional shed that will provide you with extra storage space for your gardening tools and equipment. Hopefully, you understand how to make a wood shed properly. But remember to take your time, measure carefully, and always wear protective gear when working with power tools. With a little bit of patience and some hard work, you can create a shed that will last for many years to come.
Thanks for Reading!
Forward this article to your friends who want to know tips on how to build a wooden shed.